---
title: "Assigning a signature template to a department (classic UI)"
slug: "assigning-a-signature-template-to-a-department"
description: "Create a department, add users, and assign it a signature template with a signature route in the classic Opensense portal, then set route priority."
updated: 2024-01-14T03:25:17.000Z
canonical: "https://help.opensense.com/docs/assigning-a-signature-template-to-a-department"
---
> ## Documentation Index
> Fetch the complete documentation index at: https://help.opensense.com/llms.txt
> Use this file to discover all available pages before exploring further.
# Assigning a signature template to a department (classic UI)
:::note[Classic UI]
This article covers the classic Opensense UI, where signature routes are on the **Signature Assignment** page. In the New UI, signature assignment is under **Signatures** > **Routing**.
:::
## Creating a department
1. After you [sign in to Opensense](https://help.opensense.com/docs/how-to-log-into-opensense), open the **Signatures** menu, and select **Departments**.
2. Select **+ Add New Department**.
3. Name the department.
:::tip[Use one name for the department, template, and tag]
We recommend naming each department the same as the signature template it will be assigned to. For example:
- Department name: `sales`
- Signature template: `sales`
- Banner tag: `sales`
:::
## Add users to a department
Opensense defines who is in which department by each employee's username. The username is everything before the **@** in their email address.
1. After you sign in to Opensense, open the **Signatures** menu, and select **Departments**.
2. Select the blue edit icon, in the upper right of the department you're adding users to.
3. Add users one of two ways:
- Individually
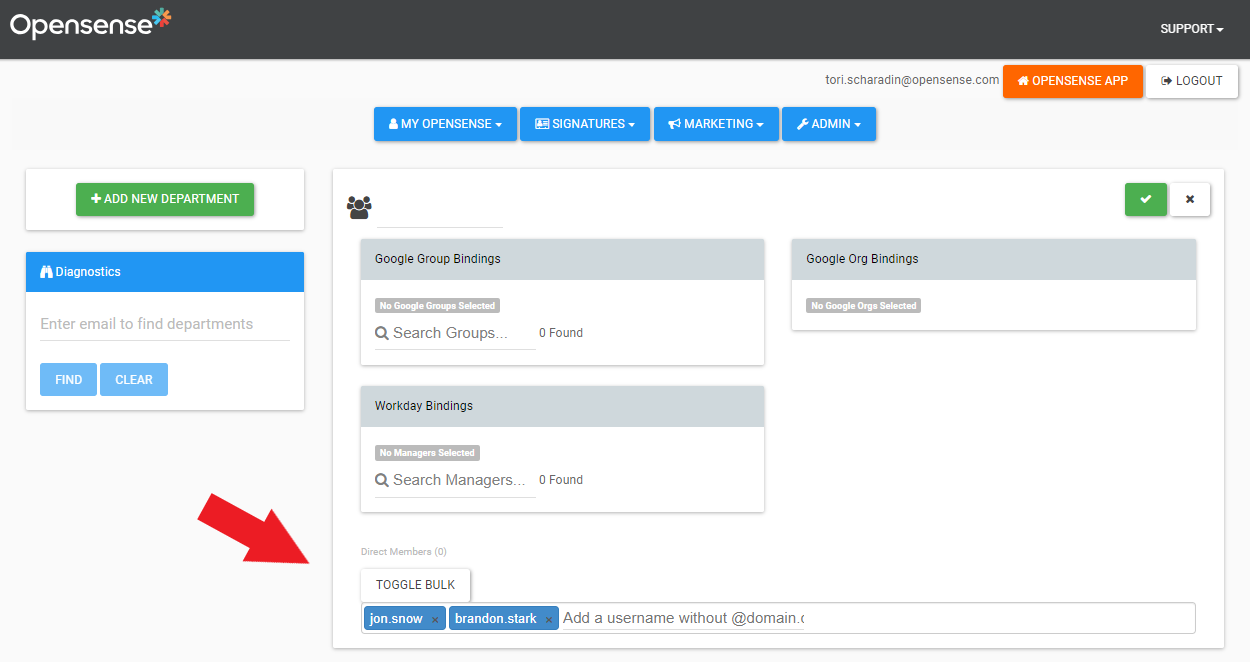
- Type each username into Direct Members. Tip: press Tab after each username.
- In bulk from a spreadsheet
- Select the Toggle Bulk button above Direct Members, then copy and paste the column of usernames you want to add from a spreadsheet.
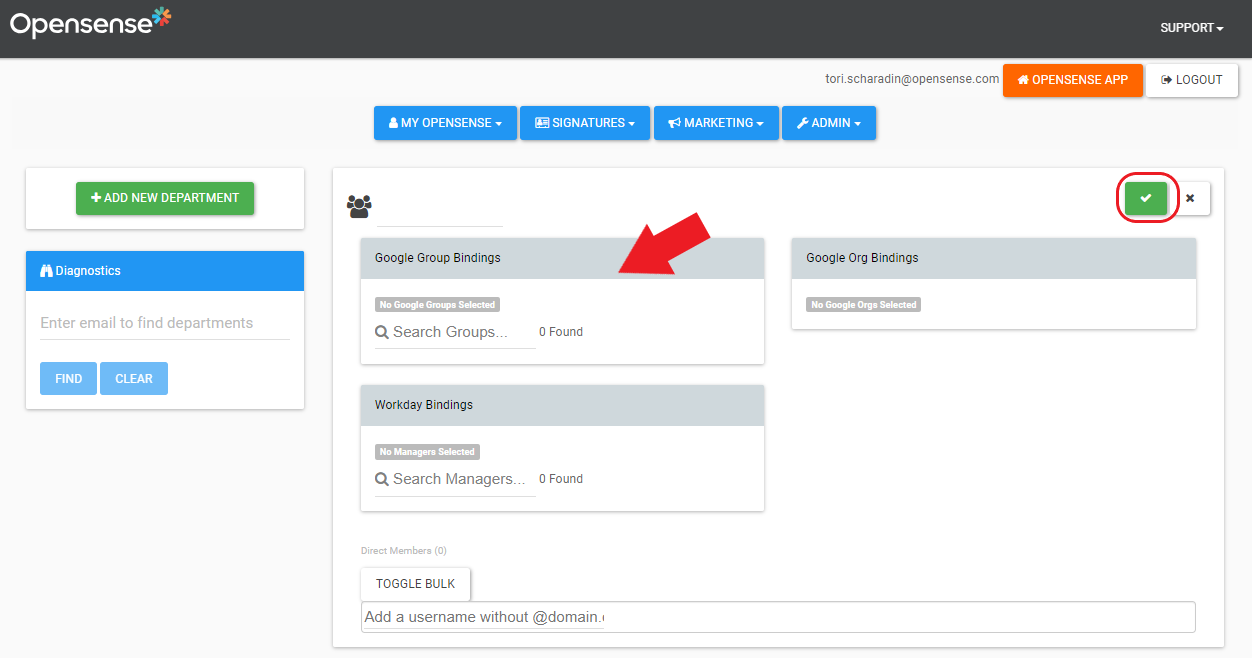
## Binding departments to your company directory
1. Search for groups that exist in your directory.
2. Select the green button in the upper right to save.
## Assign a signature design to a department
### Create a signature route
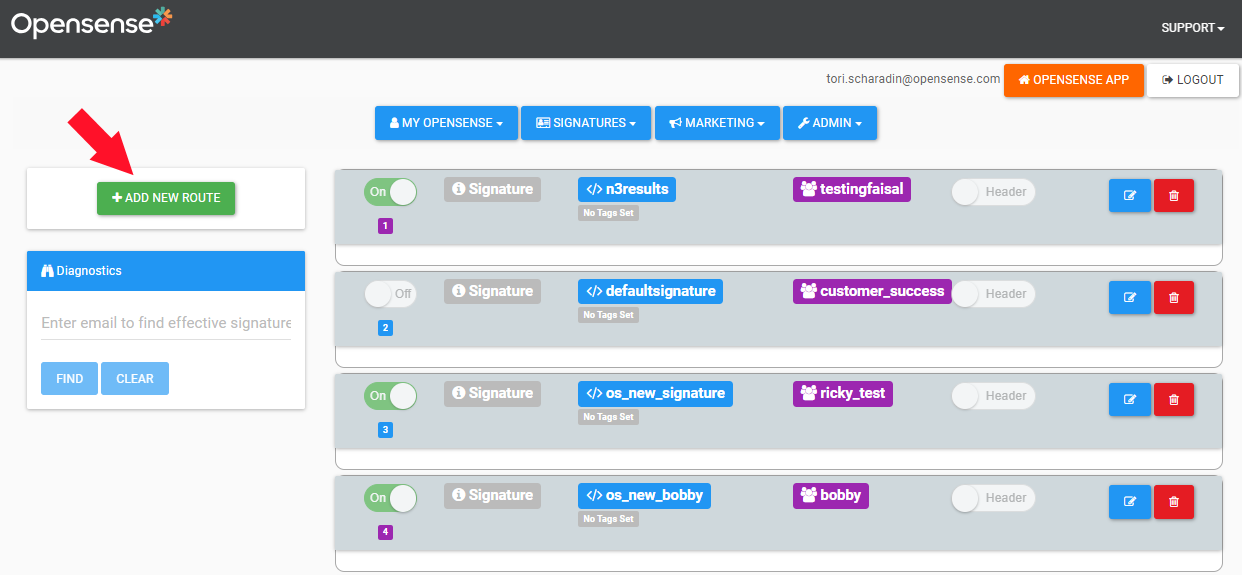
1. After you sign in to Opensense, open the **Signatures** menu, and select **Signature Assignment**.
2. Select **+ Add New Route**, and turn the route **On**.
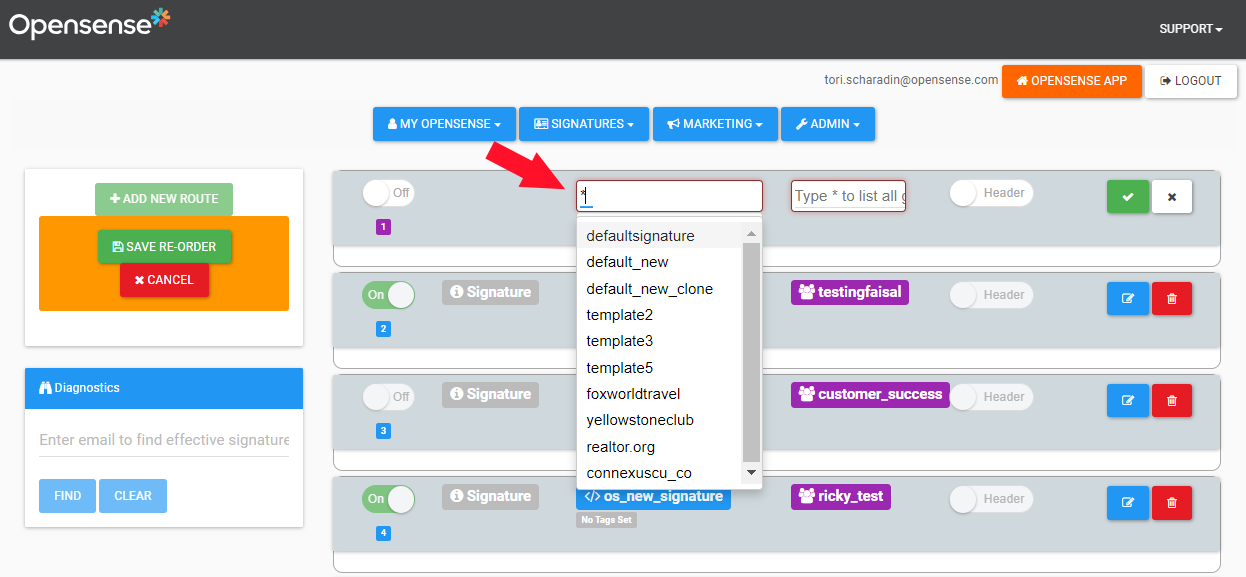
3. In the left box (for signature blocks and templates), type the signature template you want to use. You can also type `*` to see all your templates, and select one.
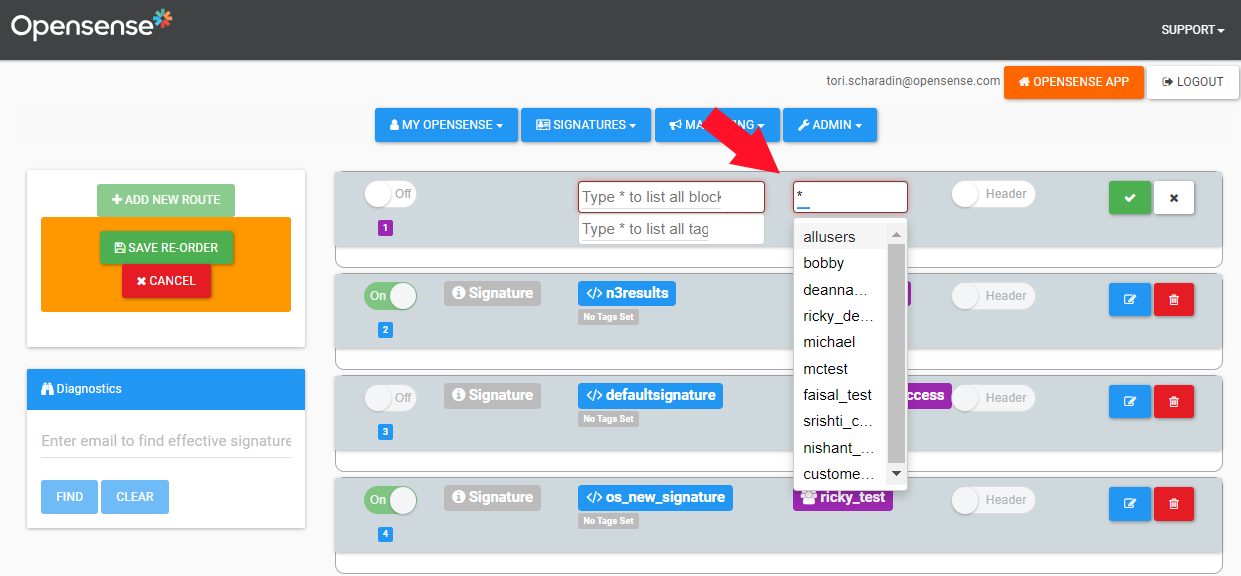
4. In the right box (for groups and departments), type the group or department to assign the signature template to. You can also type `*` to see all the departments, and select one from the list.
5. Select **Save**, and also select **Save Re-Order**.
### Route priority
The priority number under each route's toggle switch shows the route's priority. Drag and drop the signature routes to change their priority. Users who are in more than one department get the signature template of their highest-priority route.
:::tip[Keep a catch-all route]
It's always good practice to keep a signature route active for `allusers`, and to place the signature design routed to `allusers` last in priority. It then adds a signature for any users who aren't in a specific department.
:::
## Activate or deactivate a signature route
1. Select **Edit** on the route you want to turn on or off.
2. Turn the route **On** or **Off**, and select **Save**.
:::caution[Turning routes off changes signatures]
Turning routes on and off can affect which signature a user gets. If a route is turned off, its users get a signature from the next available route they're grouped in.
:::
## What's next
- [Creating a department and adding users (classic UI)](https://help.opensense.com/docs/creating-a-department-and-adding-users)
- [Department fields](https://help.opensense.com/docs/department-fields)
For further help, contact Opensense Support at [help@opensense.com](mailto:help@opensense.com).