
Problem
You want to disable the Outlook roaming signatures feature released by Microsoft because your old signatures are being synchronized from Outlook for Windows and Outlook on the Web (OWA) and are being mixed up with signatures added by Opensense.Solution
There are three options for disabling the Outlook roaming signatures feature:
- Disable roaming signatures by using PowerShell (works only for Outlook on the web and new Outlook for Windows)
- Disable roaming signatures globally via GPO (works only for classic Outlook for Windows – instructions for IT admins)
- Disable roaming signatures individually (locally) for a user (works only for classic Outlook for Windows)
Disable Roaming Signature by Using PowerShell (Outlook on the Web/new Outlook for Windows)
Microsoft is in the process of rolling out the -PostponeRoamingSignaturesUntilLater parameter used in the steps below. The rollout is expected to be completed by mid-November 2023. If the solution doesn't work for your Microsoft tenant, you can either try again later or open a support ticket with Microsoft and ask them to have Outlook roaming signatures disabled in your organization.
1. Connect remotely to your Microsoft 365 tenant with PowerShell, as described in this article.
2. Run the following cmdlet
Set-OrganizationConfig -PostponeRoamingSignaturesUntilLater $true
3. Disconnect from your tenant using:
Disconnect-ExchangeOnline
Disable Roaming Signatures Globally via GPO (Classic Outlook for Windows)
1. Sign in to your domain controller.
2. Run the Group Policy Management Console as an admin (type gpmc.msc in the Start menu).
3. Right-click the relevant organizational unit (OU) and choose Create a GPO in this domain, and Link it here (Fig. 1.).
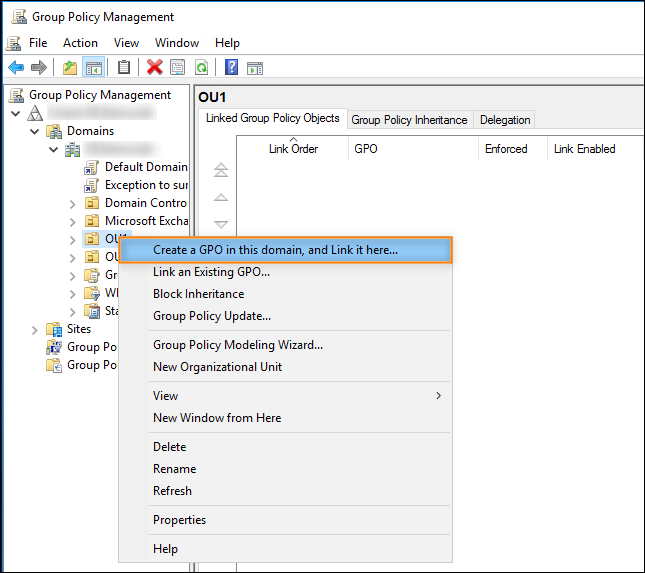
Fig. 1. Creating a new GPO to disable roaming signatures.
4. In the New GPO window that opens, name your policy object (e.g. DisableRoamingSignatures) and click OK (Fig. 2.).
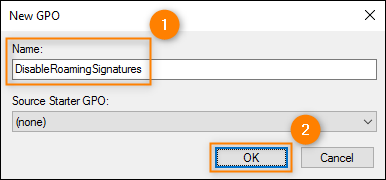
Fig. 2. Naming the Group Policy Object (GPO).
5. Right-click your newly-created GPO and select Edit (Fig. 3.).
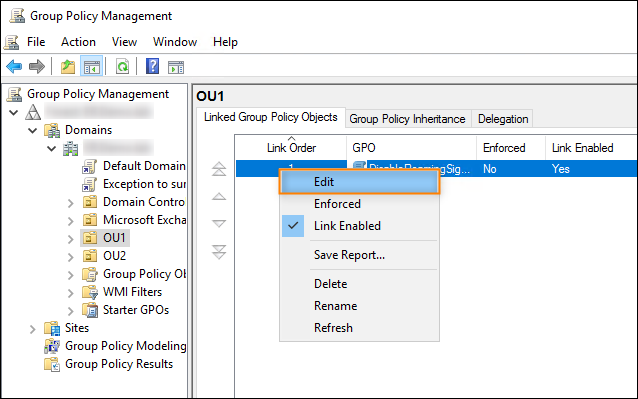
Fig. 3. Opening the GPO for editing.
6. When the Group Policy Management Editor opens, go to User Configuration > Preferences > Windows Settings > Registry in the left-hand navigation pane. Next, right-click Registry and select New > Registry Item (Fig. 4.).
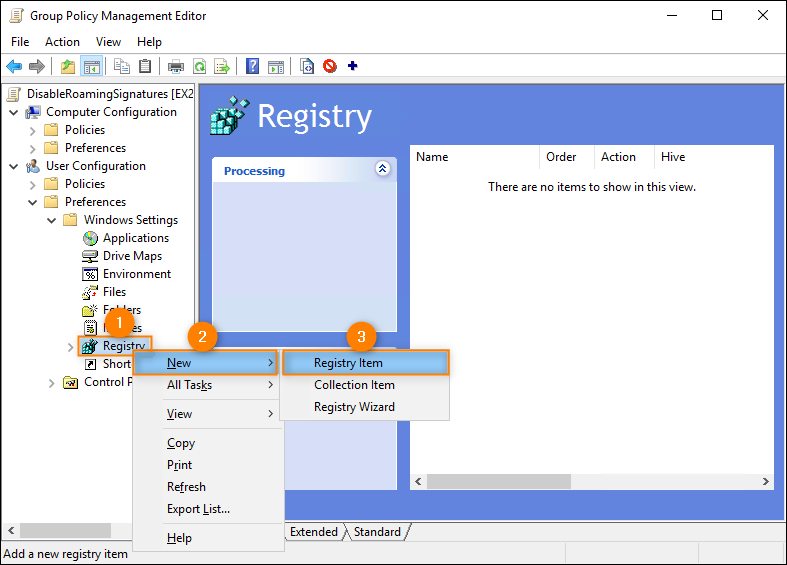
Fig. 4. Creating a new registry item in the Group Policy Management Editor.
7. Configure the settings for the new registry item as shown in Fig. 5.:
- Action: Update
- Hive: HKEY_CURRENT_USER
- Key Path: Software\Microsoft\Office\16.0\Outlook\Setup\
- Value Name:DisableRoamingSignaturesTemporaryToggle
- Value Type: REG_DWORD
- Value Data: 1
If you’re using both Outlook 2013 SP1 and newer Outlook versions in your organization, you might be required to create two identical registry items that differ only in terms of the Key Path value, as highlighted in the previous paragraph.
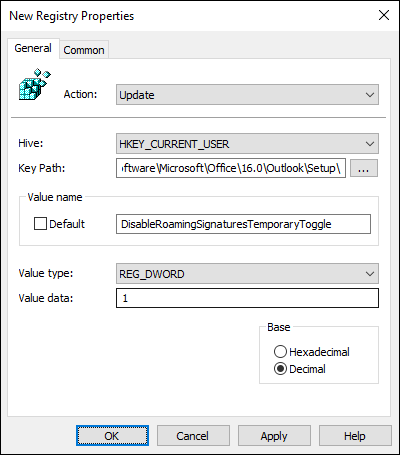
Fig. 5. Configuring the DisableRoamingSignaturesTemporaryToggle registry value.
8. Click Apply and OK to apply your changes and close the configuration window.
- Once the GPO propagates, the Outlook roaming signatures feature will be disabled for your users.
Disable Roaming Signatures Individually (locally) for a User (Classic Outlook for Windows)
There are two ways to disable roaming signatures in Outlook for Windows on a local computer:
Use the REG file to quickly update Windows registry
You can download the REG file linked below and then execute it to quickly add a Windows registry key that disables the roaming signatures feature in Outlook for Windows on your computer.
1. Download the zipped REG file from:
2. Unzip the file.
3. Double-click the file to run it - you need to have administrative privileges on the computer where you want to update Windows registry.
4. Click Yes to close the warning message and add the key that disables the roaming signatures feature. Once Windows registry gets updated, a relevant message will be displayed.
5. Launch or restart Outlook for Windows for the change to take effect.
Manually add the key that disables roaming signatures to Windows registry
1. Run the Registry Editor (RegEdit) with administrative privileges.
2. Copy the following path:
HKEY_CURRENT_USER\Software\Microsoft\Office\16.0\Outlook\Setup\
- Paste it into the Registry Editor’s address bar, as shown in Fig. 6., and press Enter to navigate to that path.

Fig. 6. Navigating to the right location in the Registry Editor.
3. Right-click anywhere inside the right pane and select New > DWORD (32-bit) Value (Fig. 7.).

Fig. 7. Creating a new 32-bit DWORD value.
4. Name the value DisableRoamingSignaturesTemporaryToggle and press Enter.
5. Next, double-click the value. In the Edit DWORD (32-bit) Value window that opens, enter 1 in the Value data field and click OK (Fig. 8.).

Fig. 8. Modifying the DisableRoamingSignaturesTemporaryToggle DWORD value.
6. Close the Registry Editor and restart Outlook for Windows for the changes to take effect.