---
title: "Syncing users from a CSV file (classic UI)"
slug: "manual-sync-of-a-csv-file"
description: "Classic UI: load or update users' signature data by syncing a CSV file into Compliance, with the column format and the CSV commands for whole columns."
updated: 2024-01-14T01:18:00.000Z
canonical: "https://help.opensense.com/docs/manual-sync-of-a-csv-file"
---
> ## Documentation Index
> Fetch the complete documentation index at: https://help.opensense.com/llms.txt
> Use this file to discover all available pages before exploring further.
# Syncing users from a CSV file (classic UI)
:::note[Classic UI]
This article covers the classic Opensense UI. In the New UI, user profiles are under **Manage** > **Users**.
:::
## Overview
Sync a CSV file into **Compliance** to load or update your users' signature data by hand, for example when you don't have a directory sync. To edit a few users, see [Choosing how to edit user data](https://help.opensense.com/docs/editing-user-data-guide).
## Preparing the CSV file
- The column headers must match your signature's field names exactly. Your signature block's fields, for example `[[+]] name: title: phone: mobile: [[+]]`,  the CSV column headers.

- `username` must always be the first column. The username is the text before `@domain.com` in an email address. For example, the username for jane.doe@opensense.com is `jane.doe`.
- Save the spreadsheet as a CSV file.
## Syncing the CSV file
1. In the **Signatures** menu, select **Compliance**.
2. On the left of the screen, select **Sync Tools**.
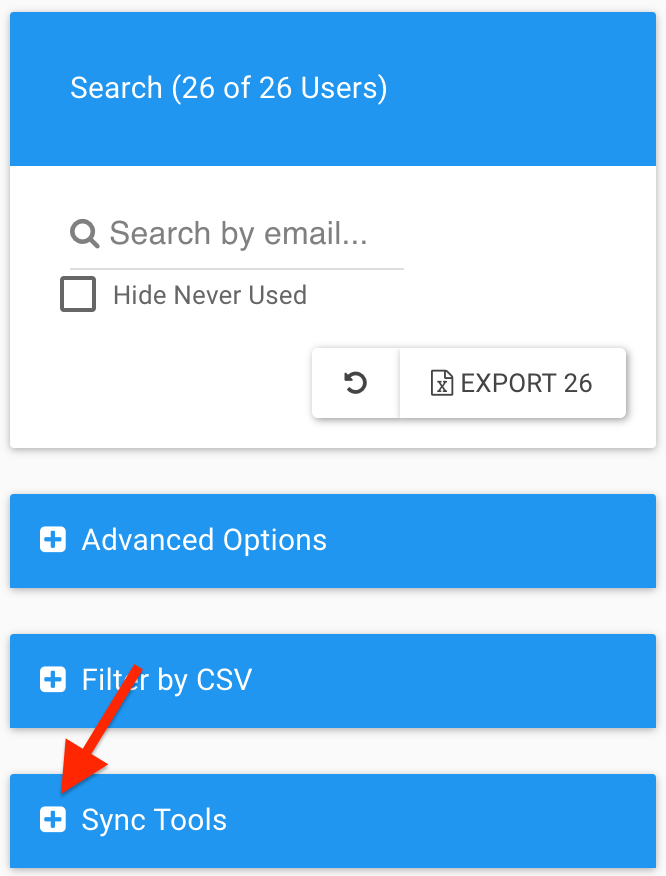 3. Select **Choose File**, and choose your CSV file.
4. Select **Sync CSV**.
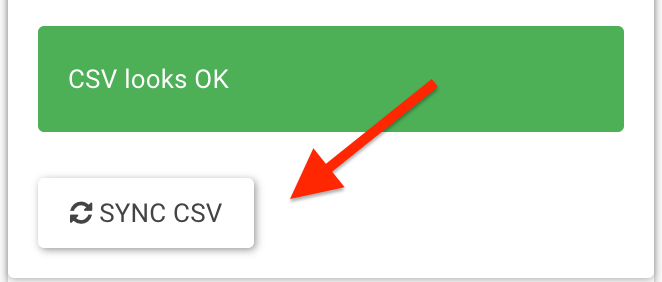 5. When the sync is finished, refresh your browser.
The new data now shows in **Compliance**.
## CSV commands for bulk changes
A few CSV commands make bulk changes to a whole column. Add them after the field name in the column header, in the format **field-command**:
-locked- Locks all the field data in the column (for example,
title-locked).
-unlocked- Unlocks all the field data in the column (for example,
name-unlocked).
-nosync- Breaks the sync on all the field data in the column (for example,
phone-nosync).

## What's next
- [Editing users in bulk in Users & Compliance (classic UI)](https://help.opensense.com/docs/bulk-edits-in-users-compliance): change only some fields for many users.
- [FTP data sync file requirements](https://help.opensense.com/docs/ftp-data-sync-technical-specs): sync from a data source Opensense doesn't integrate with.