

Setting up the Opensense CNAME in Cloudflare
Overview
Section titled “Overview”When you add a CNAME record in Cloudflare, you can proxy the record (orange cloud) or leave it unproxied (grey cloud). Proxied records route traffic through Cloudflare’s edge network, while unproxied records resolve directly to the target host. For the Opensense integration to work properly, the CNAME must stay unproxied, so that it always resolves to the correct service endpoint.
Why this matters
Section titled “Why this matters”- Consistent and secure brand presentation across emails
- Support for Opensense’s email signature and tracking infrastructure
Adding the Opensense CNAME record in Cloudflare
Section titled “Adding the Opensense CNAME record in Cloudflare”Opensense asks customers to create a new CNAME record in their DNS: host smart, pointing to whs.sendergen.com. For the full list of records, see Required DNS settings for Opensense.
- In Cloudflare, add a DNS record, and set Type to CNAME.
- In Name, enter
smart(the subdomain, or host). - In Target, enter
whs.sendergen.com(the target domain). - Turn Proxy status off, so it shows DNS only.
- Select Save.
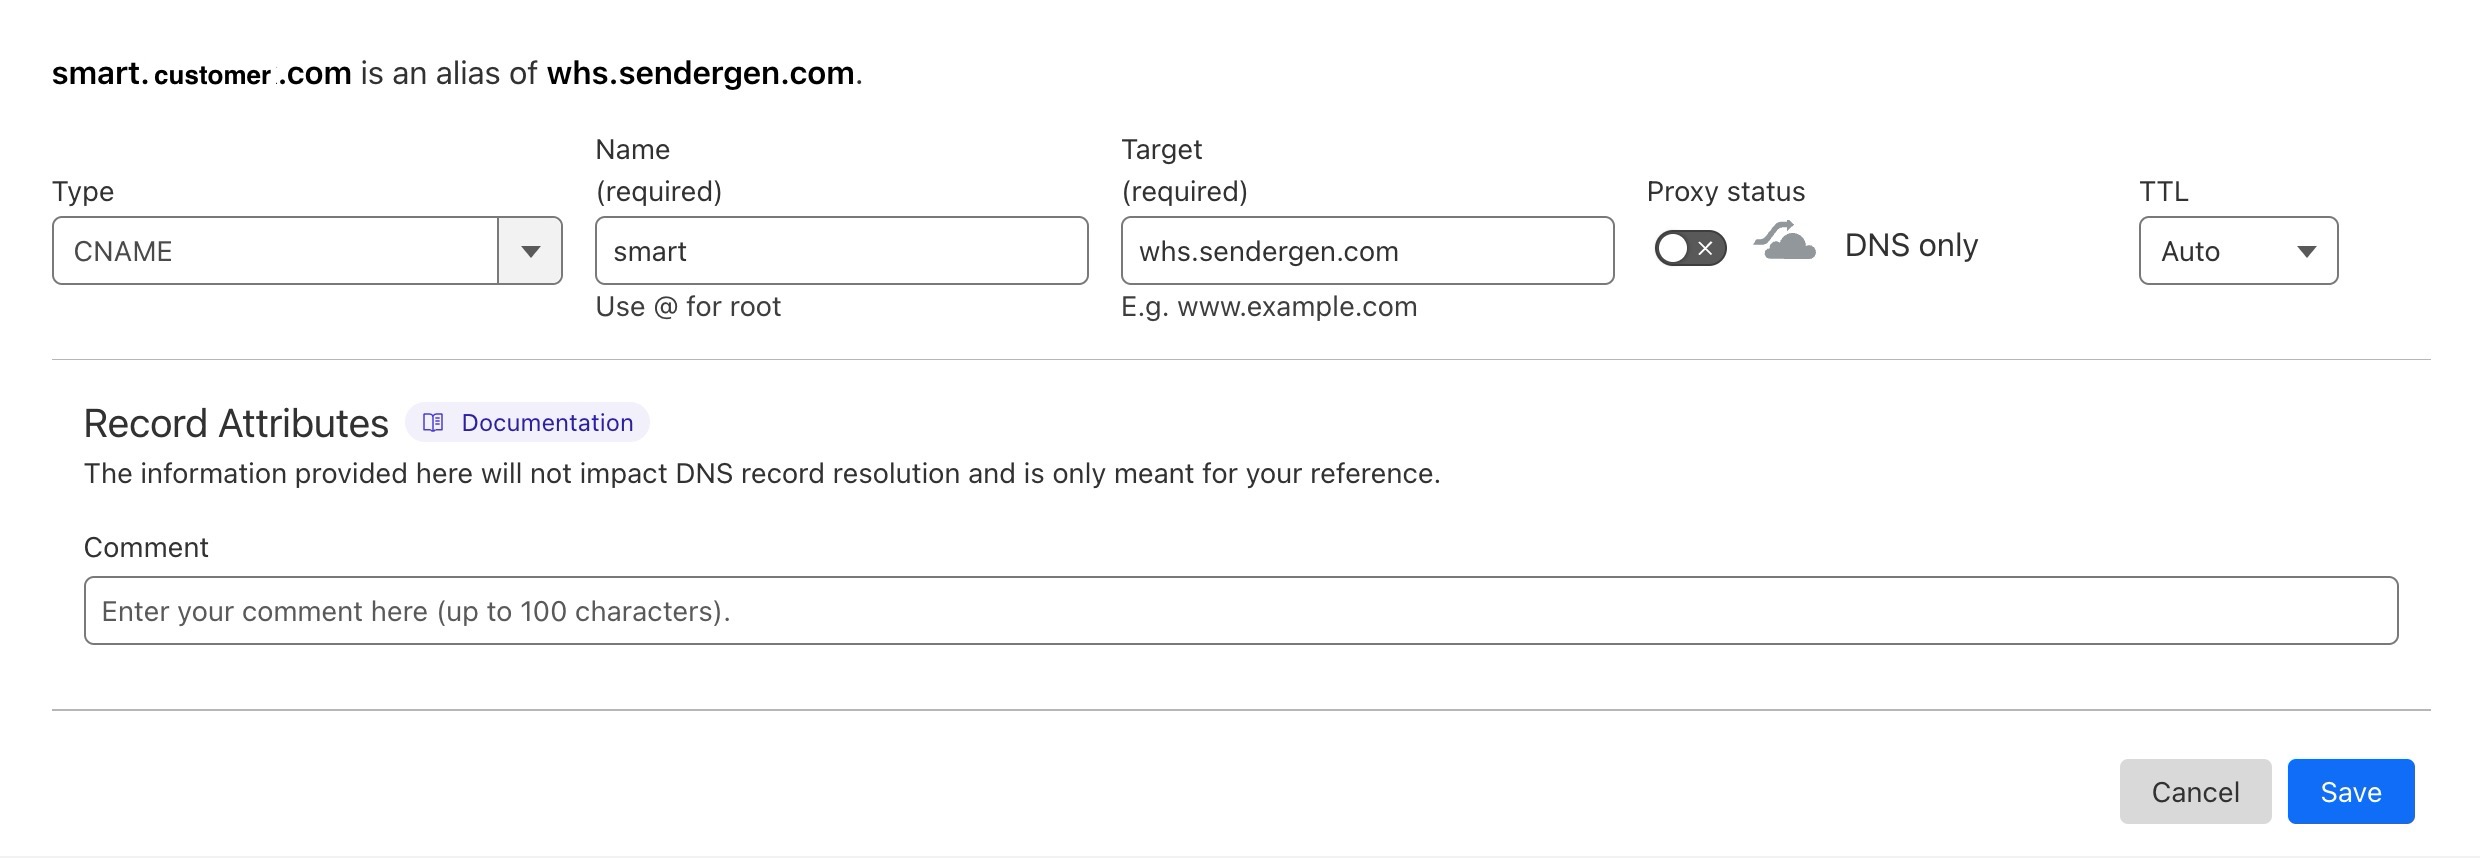
The Proxy status toggle turns the Cloudflare proxy on or off. The Opensense CNAME should have the proxy off.
What’s next
Section titled “What’s next”- Required DNS settings for Opensense
- Verifying your Opensense DNS records: check that the record resolves.
For further help, contact Opensense Support at help@opensense.com.