

Verifying your Opensense DNS records
Overview
Section titled “Overview”To make sure your email authentication records are configured correctly, check your CNAME, SPF, DKIM, and DMARC DNS records. This article shows how for the two records that Opensense requires: the CNAME record, and the SPF record.
Choose a tool
Section titled “Choose a tool”The Google Admin Toolbox Dig is a quick, browser-based way to check DNS records. Or run the dig command directly from your terminal or command line, for example dig CNAME smart.customer.com or dig TXT customer.com.
Check the CNAME record
Section titled “Check the CNAME record”- In Google Dig, select CNAME.
- In Name, enter your custom record (
smart.customer.com).
The expected result (TARGET) is:
whs.sendergen.com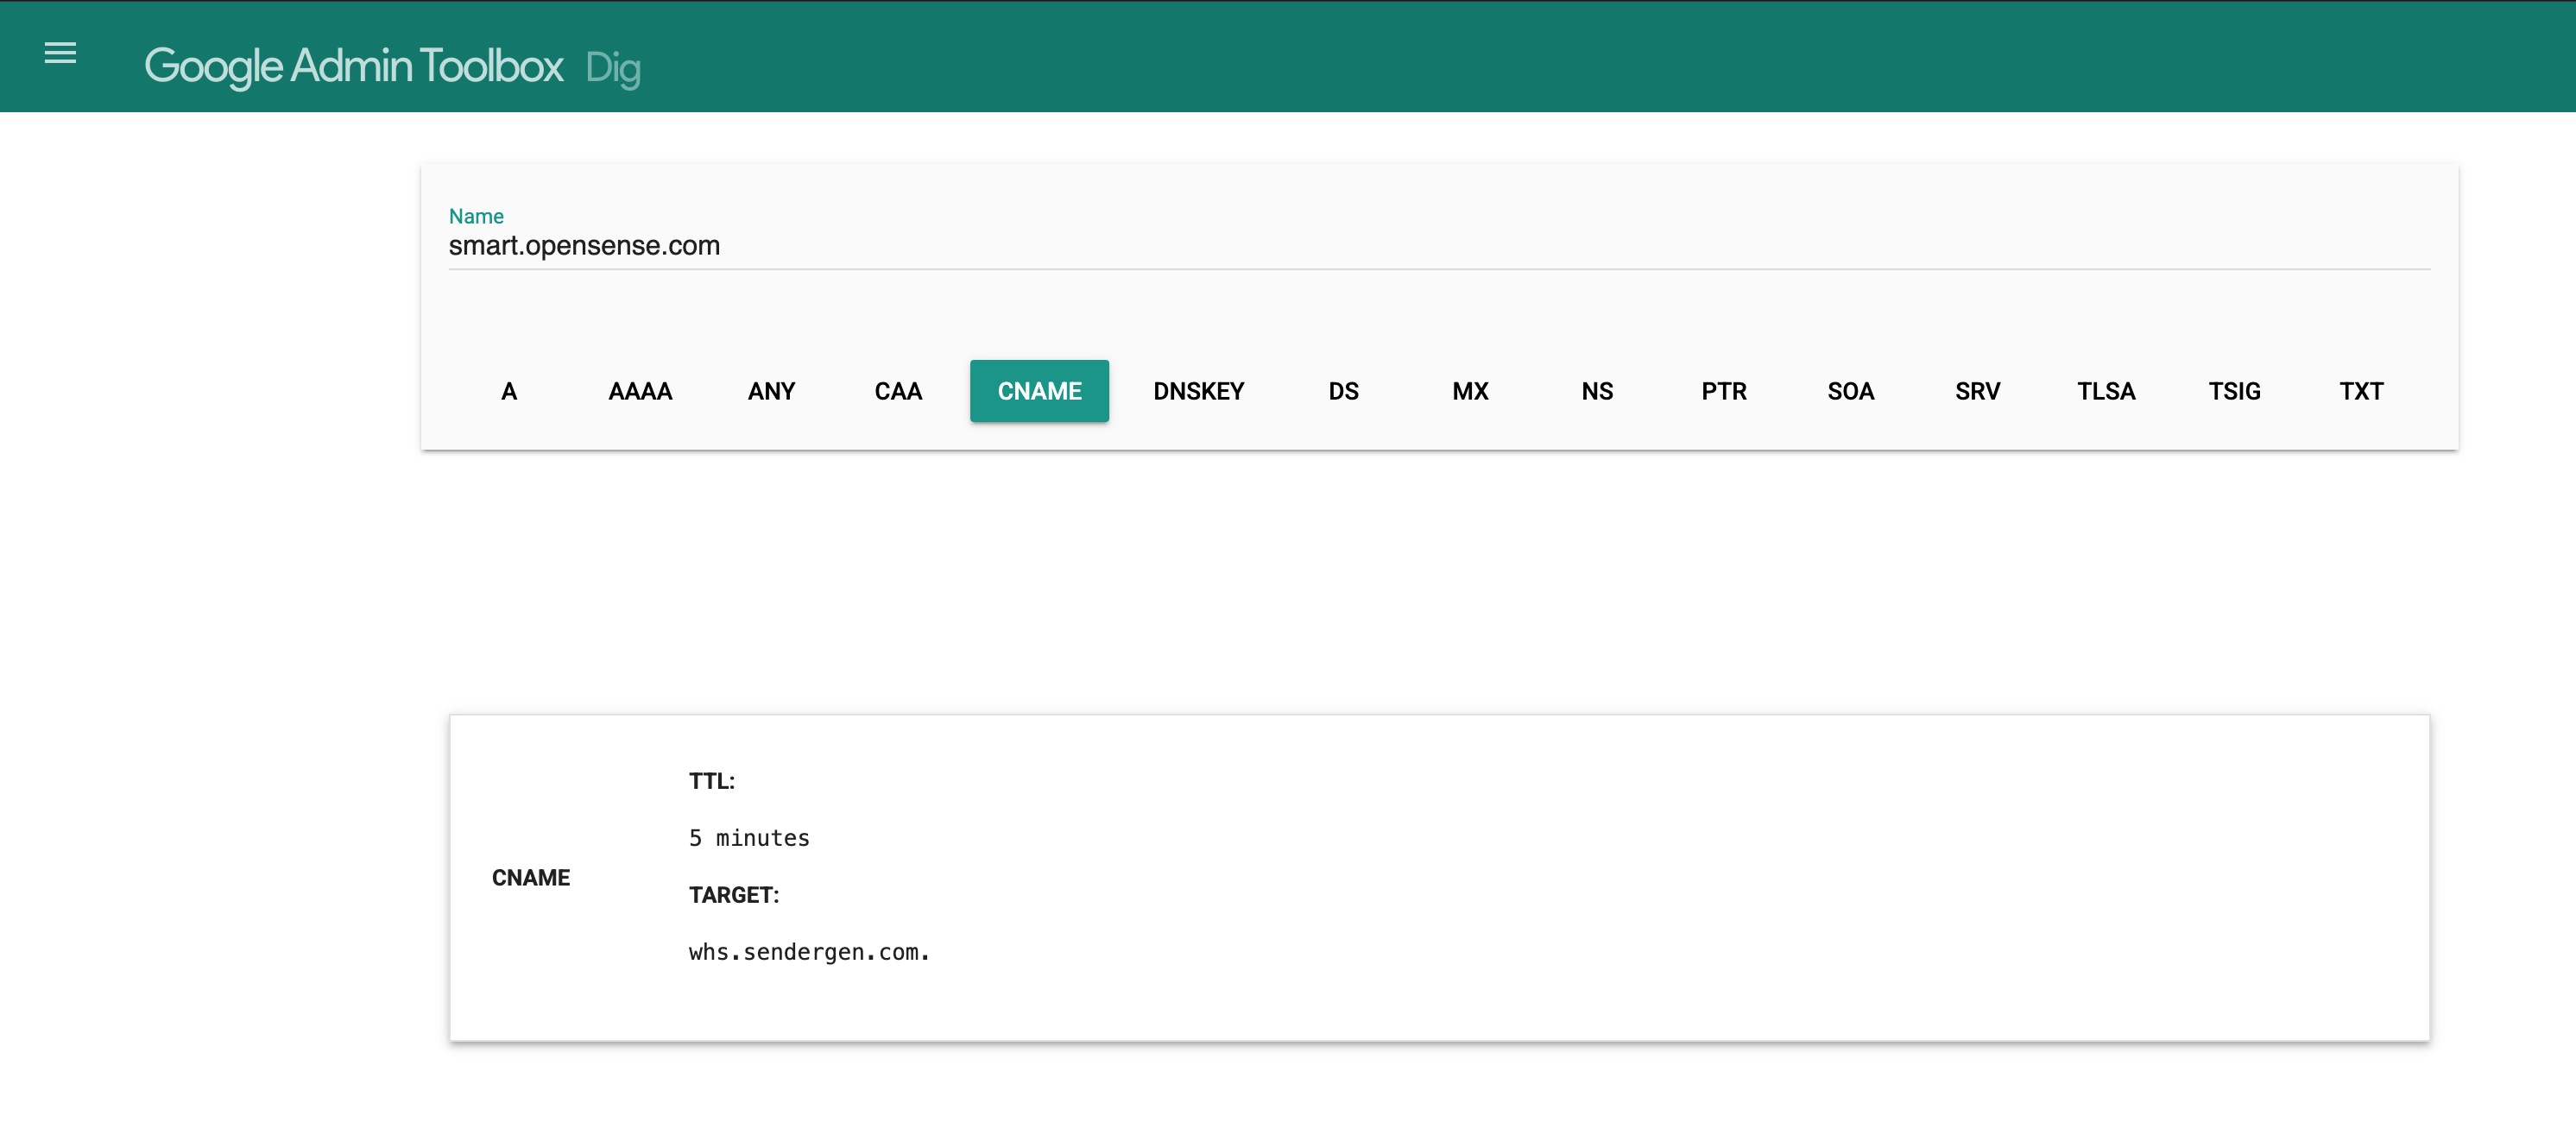
Check the SPF record
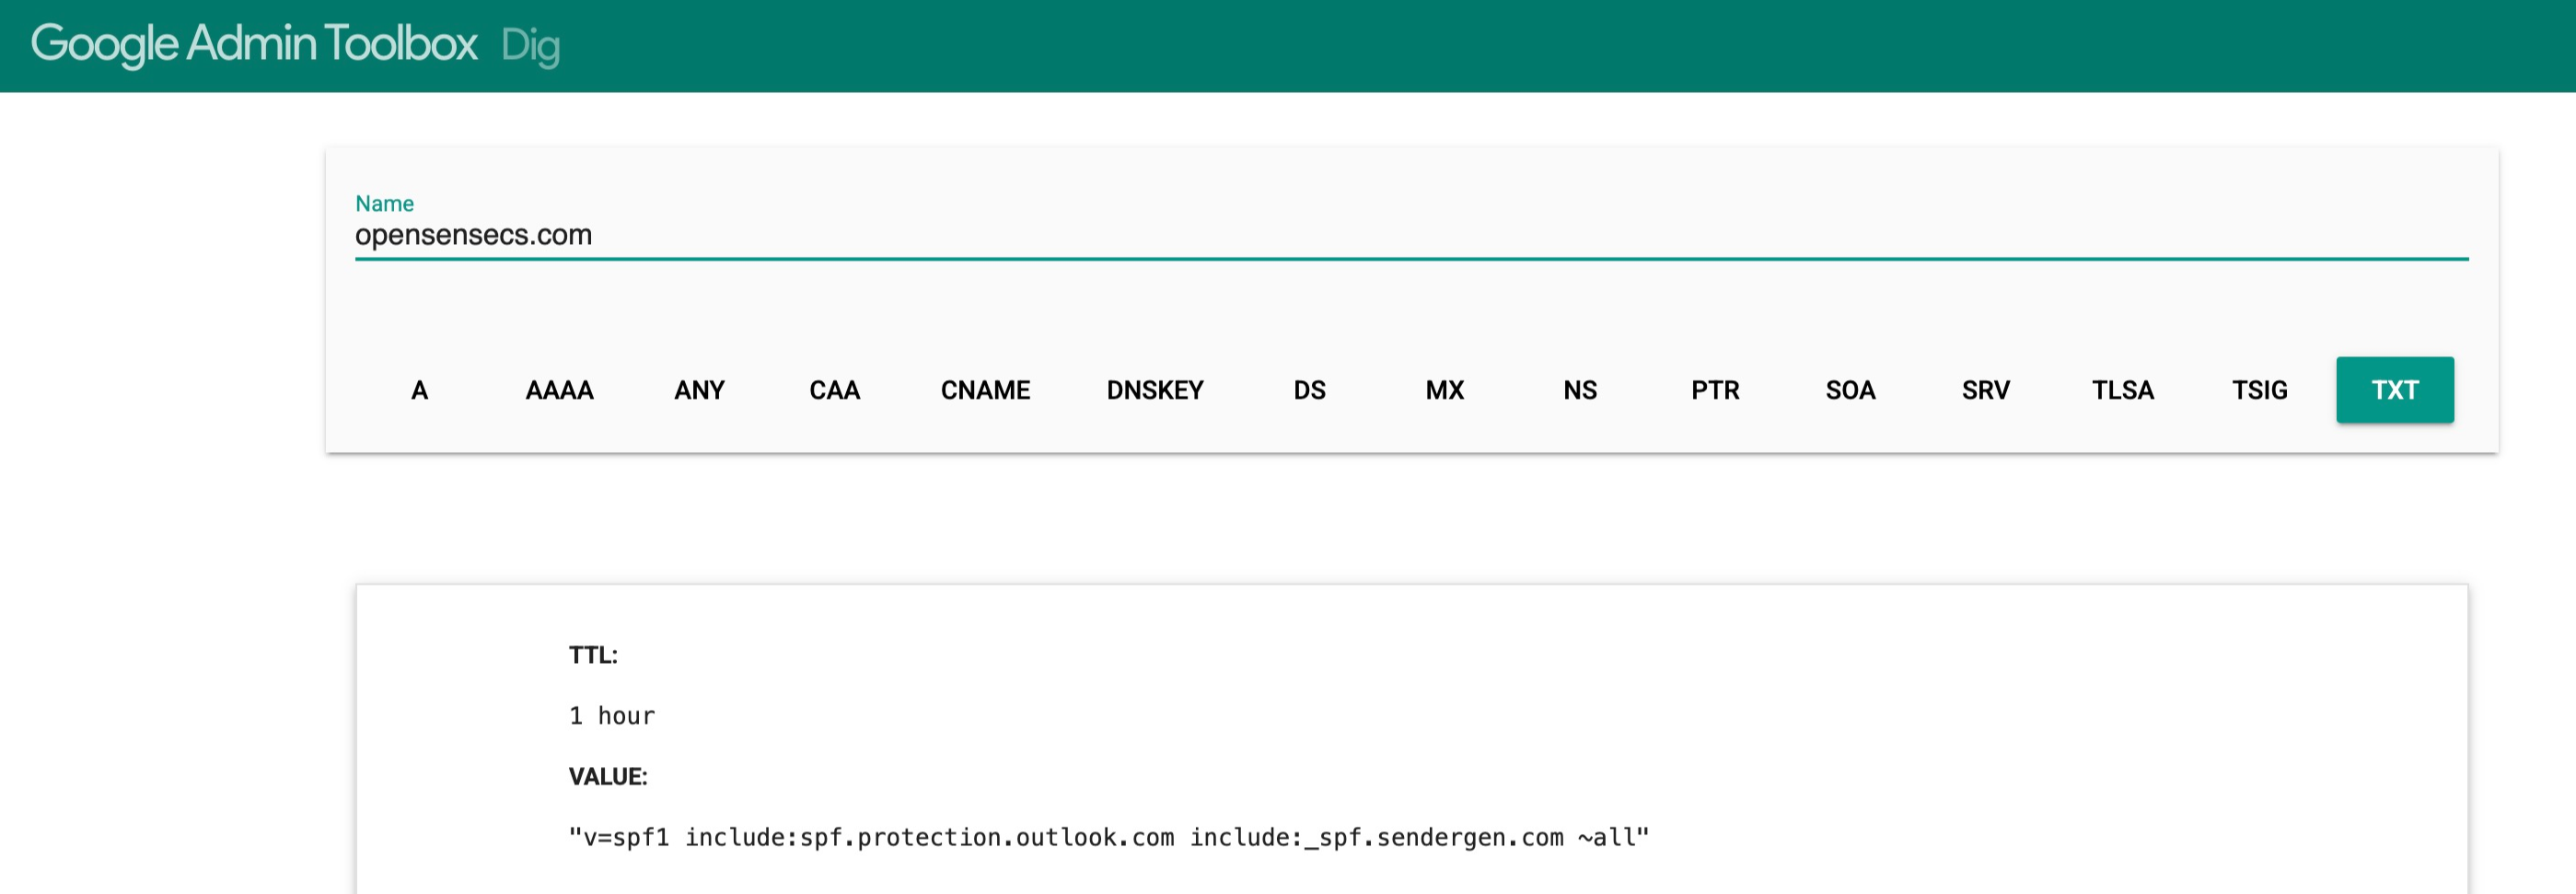
Section titled “Check the SPF record”- In Google Dig, select TXT.
- In Name, enter your domain.
The record always begins with v=spf1, and must include Opensense:
v=spf1 include:_spf.sendergen.comThe rest of the entries (for example, include:, ip4:, or -all) may look different, depending on your organization’s configuration.
What’s next
Section titled “What’s next”- Required DNS settings for Opensense: what the records should contain.
- Setting up the Opensense CNAME in Cloudflare
For further help, contact Opensense Support at help@opensense.com.