

Using Outlook voting buttons with Opensense signatures
Overview
Section titled “Overview”Voting buttons (sometimes called polling buttons) collect data in email messages quickly and easily. They’re a Microsoft 365 (Office 365) feature in Outlook, and need a Microsoft Exchange account.
Voting buttons may not work when an Opensense signature is applied. If you need them, see Keeping Opensense signatures off voting emails.
Adding voting buttons in classic Outlook
Section titled “Adding voting buttons in classic Outlook”-
Create an email message, or reply to or forward one.
-
In the message window, select the Options tab, and then select Use Voting Buttons (in the Tracking group).
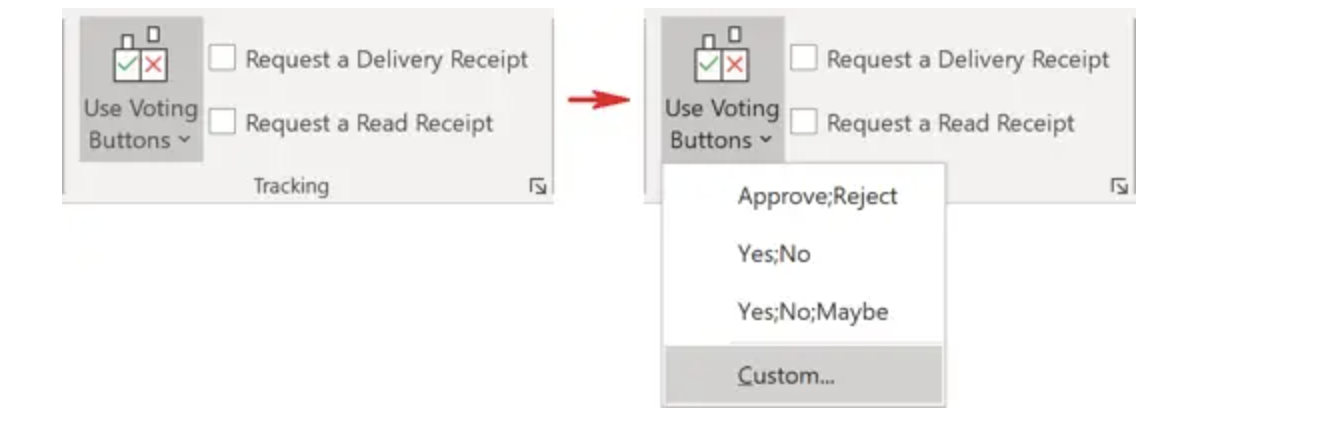
-
Select one of these:
- Approve;Reject
- Approve or reject.
- Yes;No
- The best choice when you want a definite yes or no.
- Yes;No;Maybe
- Gives recipients a third option.
- Custom
- Create your own voting button names.
-
If you choose Custom, set the properties for the voting buttons in the Properties window. Separate the button names with semicolons.
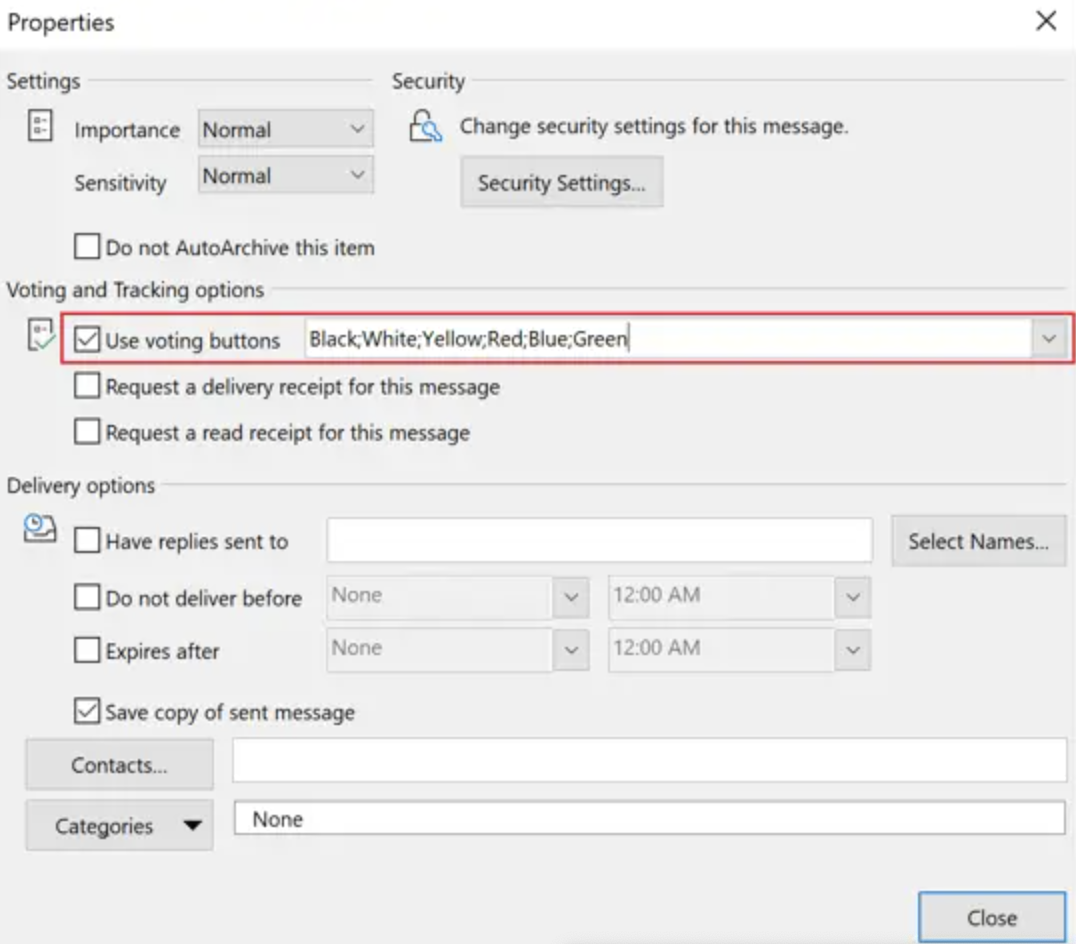
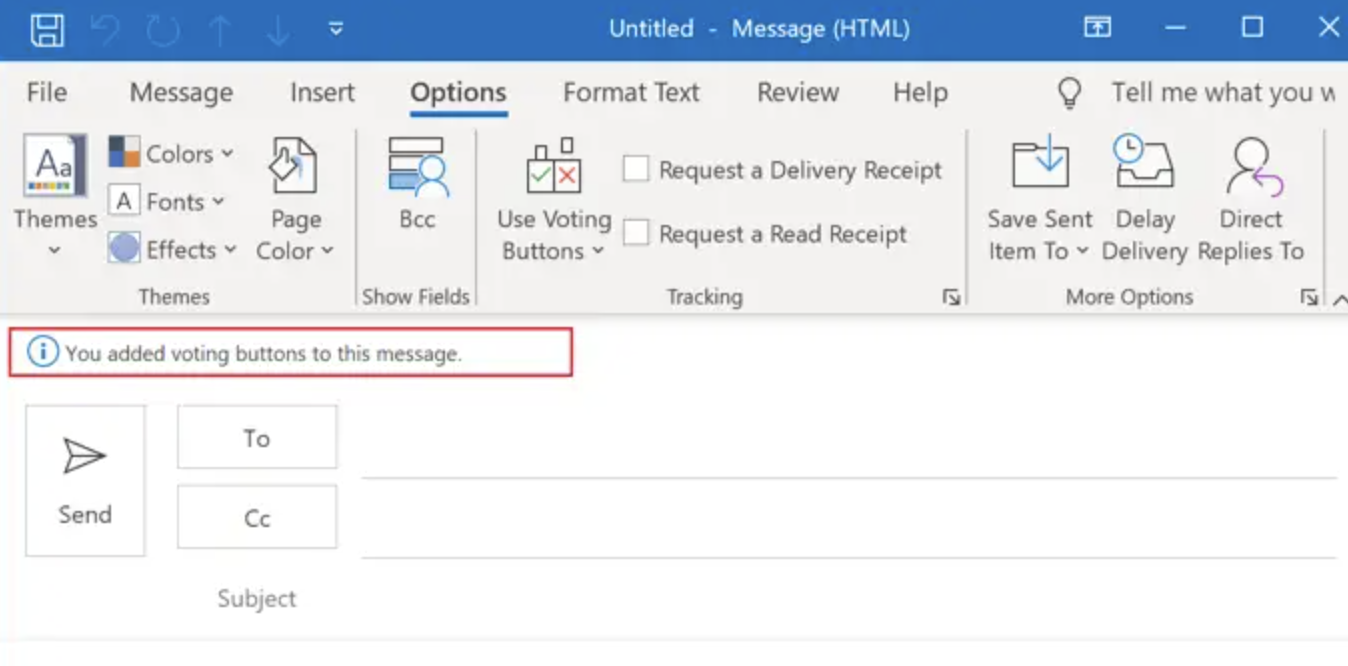
When you’ve added voting buttons, a message at the top of the email confirms it: “You added voting buttons to this message.”
Keeping Opensense signatures off voting emails
Section titled “Keeping Opensense signatures off voting emails”Voting buttons may not work when an Opensense signature is applied. If emails need voting or polling buttons, you may be able to add exclusions to the mail flow rules, so Opensense signatures aren’t applied to them.
To find the best resolution, contact help@opensense.com with any concerns or questions, and get connected with an Implementation Engineer.